Thursday, January 28, 2016

Month of Mending: Darning


We've come to the end of the Month of Mending and I thought I'd leave you with an advanced mending technique: darning. Many of you will have already heard about darning socks and may have even done so.

The darning on the left isn't a terrible mending job, but if I'd used the same color yarn, it would be less visible. On the mending below, which is the foot of the same sock, you have to kind of squint to see where the fabric is different.


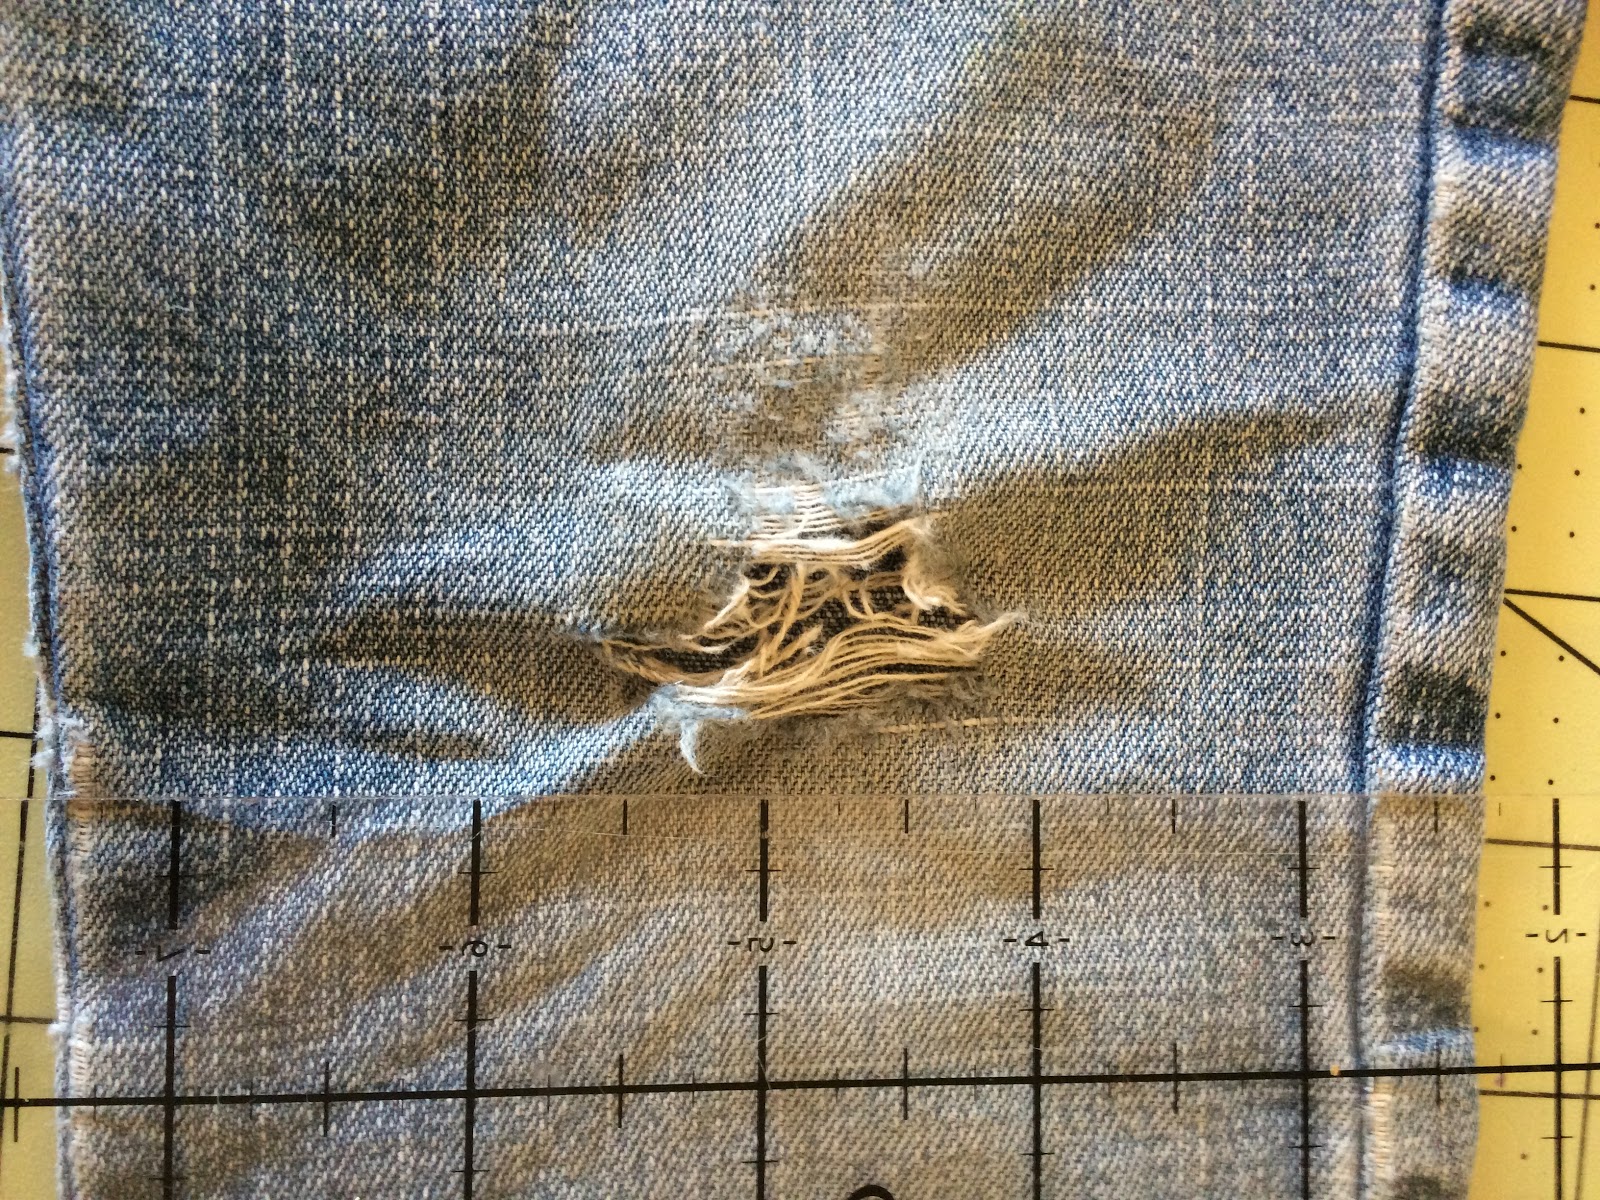
But you can darn just about anything made of any kind of fabric and the method is more or less the same. I tend to use it for holes that are about an inch in diameter (2.5cm) or smaller. That's about the size of a US quarter. Any larger than that and I put a patch on it. When you can match the color of the thread to the ground fabric, it's great for places where you want your mending to be as inconspicuous as possible. I drew a little diagram here, but I've also found some very nice drawings from the DMC Encyclopedia of Needlework, which is free via Project Gutenberg and in the public domain.


Darning is just weaving on a teeny tiny scale so that you can replace the missing fabric. The drawing above shows how to lay down the warp threads. Ideally, you can match the weight of the fabric by using the same size thread as what the ground fabric is made from and replace the warp thread-for-thread. That's not always possible or desirable, but I will say that if the darning and the ground fabric are too mismatched, you risk further damage to the garment and/or ruining your darning job.


To the right, you can see how to weave the weft and it can be as easy as under, over, under, over, like when you did paper weaving in grade school, only tiny.

Here's one that I've done in different colors for the warp and weft, which ends up with kind of a neat effect. 


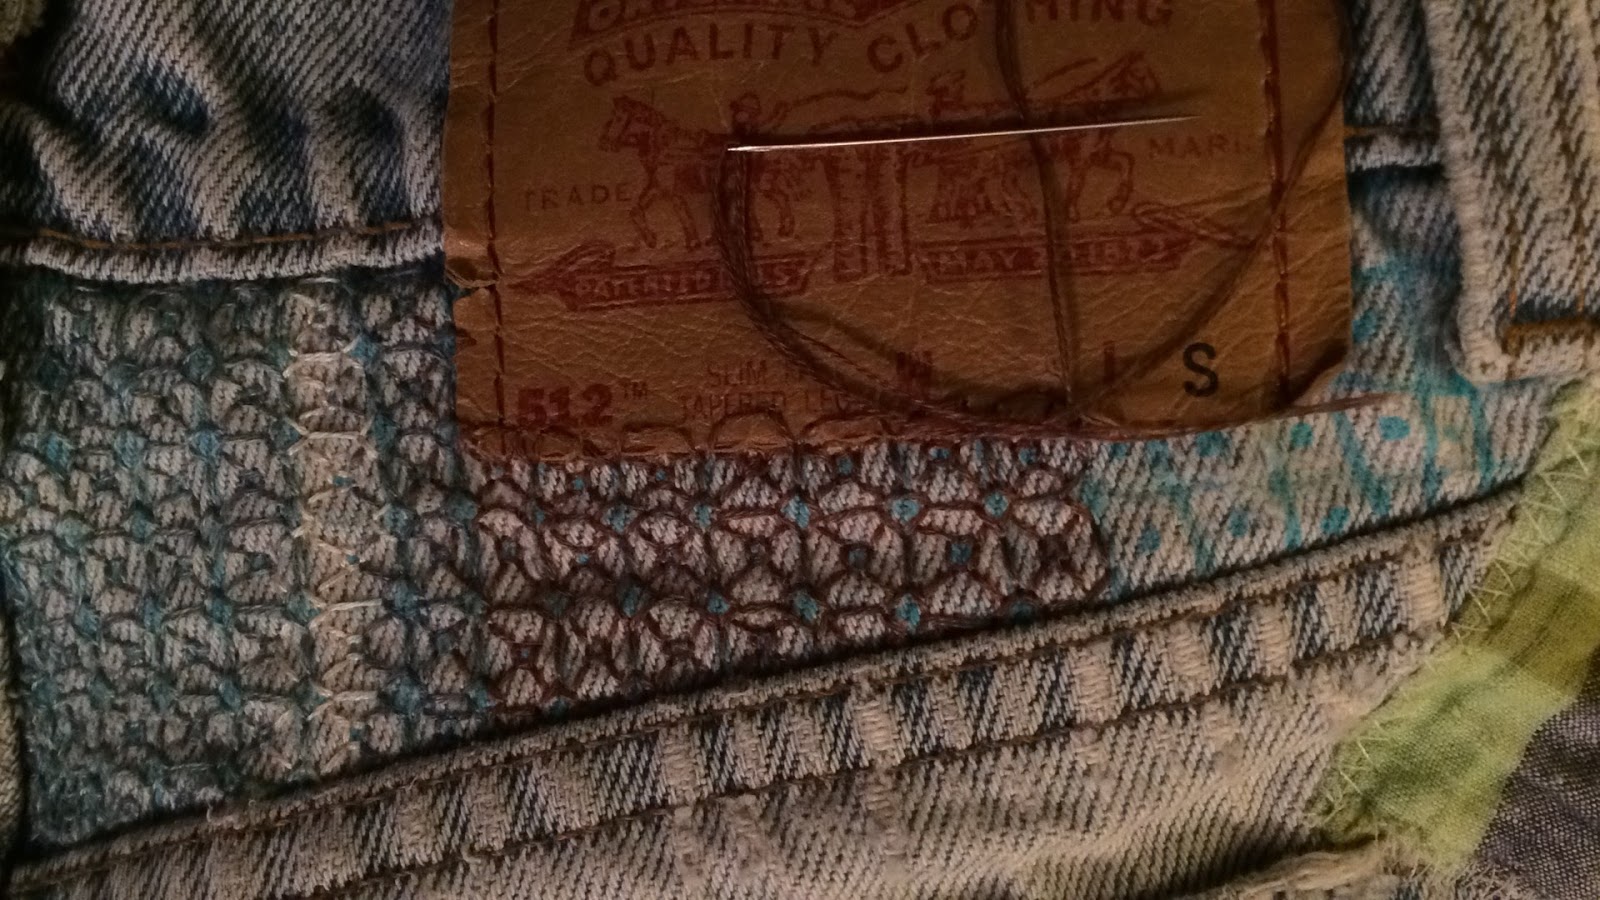
And now it gets fancy. Just like in weaving something larger, you don't have to just do a plain weave, aka tabby weave. When you're mending jeans, you can weave a twill to match the weave of the fabric or, if you want to get super fancy, there's damask darning. The DMC encyclopedia has several examples in the chapter on mending.

You can use any weaving pattern on a darn, which is useful if it's going to be visible and you want to show off your mad darning skills.

This week, I grabbed the left shoe of a pair of canvas shoes that I'd gotten new on sale for less than ten bucks several years ago. The holes were about the right size, so I thought I'd try out damask darning on the bigger hole.


I like these, they're comfy and only the left shoe had worn out in those two places (my shoes always wear out on the left in the same places). The right is in pretty good shape, so I thought it was a good candidate for mending. For most of my darning I use plain ol' DMC stranded cotton embroidery thread. It's cheap and easy to come by in lots of colors and I have a whole heap of it laying around.

Here it is in progress, and you can kind of see the damask pattern shaping up. I didn't manage to keep up the pattern much farther than that, but I'm certain I could manage with some practice and with threads that contrast well.

And here's the finished shoe. I don't know how well it's going to hold up to further abuse, so we'll have to revisit this mend after a while, but it does look much better than it did and I'll be able to get at least a little more wear out of it than if I hadn't darned the holes. A little Gorilla Glue around the top of the soles and they'll be almost as good as new.

And that's it for the Month of Mending this year! I hope you're encouraged to fix it when you can instead of throwing it out so that you can show off your awesome hipster activist art.

Next month in our year-long-along-of-alongs will be February is for Finishing. This year, I'm going to be more honest than usual about all the projects I have going on. We can think of it as therapy for DaVinci Disorder.

Happy mending and see you in February!

Thursday, January 21, 2016

Month of Mending: Sashiko patches

Blackwork is really great for reinforcing fabric, but not so great for repairing holes. One of my favorite ways of doing that is with sashiko, a Japanese mending technique that's alternately referred to as embroidery and quilting. Unlike blackwork, sashiko was an art of impoverished people, developed from necessity. A poor farmer or fisherman's wife would recycle old clothes that had been worn to rags by cutting patches from the least worn parts and stitching them to worn parts of newer clothes. This was slow fashion before slow fashion was cool. In the Edo Period, sashiko was used to make protective coats for firemen and on Sado Island during WWII, some pretty hardcore ladies made sashiko coats to protect them as they carried logs down mountains on their backs1.

Sashiko means "little stabs" and is usually done with light thread on dark fabric, generally indigo dyed cotton-- you know, like your jeans.

It really looks complicated, but it's only running stitch. There are a few rules about turning corners2, but the mechanics of sashiko are really not at all difficult.

For these patches, I've used a fabric with a square pattern woven in so that I could "cheat" and make my lines and stitches even and on patterns that I've seen, each stitch is charted out for you. Honestly, I don't have time for all that and, I'd wager, neither did the mothers and wives in Japan. Neater stitches are, of course, more desirable, but that comes with practice.

Here's a pair of little Bu jeans that was torn after a fall on concrete. She had a scraped knee and some tears, but was otherwise fine. Her jeans were not so fine. The hole is about two inches wide and about an inch tall. The fabric on the other knee was week, so I decided to do matching knee patches.


She picked Spider-Man fabric for the patches, so I fussy-cut a couple of patches and found patterns that I thought would work well: Amime (net) and Higaki (cypress fence)3.

Designs were transferred to the patches, then pinned over the holes.

The knee with the hole got a smaller design and the knee with only weak fabric got the larger design, the rule of thumb being that more stitches means more reinforcement. I did my best to follow the rules for tidy corners and since the wrong side wouldn't be seen, I didn't worry about carrying the thread across the back. I worked from the middle to the edge as best as I could.

Instead of turning the edges under as I did with the jeans above, I decided to blanket stitch around the raw edge to keep it from raveling. I don't know how it's usually done, so this is experimental.


I used some bright blue DMC stranded cotton out of my stash and a regular embroidery needle. Sashiko needles are a thing, as is sashiko thread, but in the interest of economy (with a nod to those thrifty Japanese ladies), I used what I had.

The result seems sturdy so far, but we'll see how it holds up after some small person action and a wash or two. If my jeans are any indication, I think they'll be fine.


The best part of this repair was when Bu gasped and said, "You fixed them! Thanks, mom!" The whole operation was the work of two days (not constantly) and a happy girl made every minute worthwhile.

Next week will be darning and I've discovered some super fancy techniques that I haven't tried yet.

1. A little history on sashiko here
2. How to turn neat corners
3. A short tutorial and some patterns

Thursday, January 14, 2016

Month of Mending: Blackwork Embroidery

As it turns out, I really didn't know that much about blackwork embroidery until this week, but I found an excellent history (with citations!) here. The most interesting tidbits that I learned from the aforelinked history were that blackwork likely originated in Egypt and that the painter, Holbein the Younger, depicted royal garments in such detail that the stitches could be seen. His portrait of Jane Seymour, Henry VIII's third wife, shows a particularly good example of blackwork on the cuffs of her dress, though Catherine of Aragon, Henry VIII's first wife, was an accomplished needlework artist and brought blackwork with her from Spain. The double running stitch used in blackwork is called Holbein stitch after the artist.

Those cuffs, tho'
For mending, we break all the rules of blackwork embroidery. Blackwork is generally done as a counted-thread embroidery on evenweave fabric, traditionally in black silk thread on cotton or linen.


I use blackwork designs to reinforce weak fabric, such as the area just below the pocket here. It was used in much the same way in the 16th century, but mainly, it's a decorative art. In mending, it both adds a layer of thread to the front and back of a piece that may see a little bit of abrasion and it binds the ground fabric, preventing raveling or fraying.


Stitching that is denser provides a little more reinforcement, but is difficult to do on fabric that is very weak or thin. Less dense stitching doesn't reinforce as well, but can be used on slightly thinner fabric. Here I've used a blue that closely matches the jeans for a subtler, textured effect.


Since I'm not using an evenweave fabric as a ground fabric, you can see on the right where I've hand-drawn a grid to follow. Mine is a little wonky, but yours doesn't have to be. I'm told there are these things called "rulers," but I think they're a fairy tale.


"Black"work doesn't have to be black, either. You can use any color that pleases you.

Finally, you can add a blackwork pattern to a patch to secure it. If you wanted to be super fancy, you could use an evenweave fabric as your patch to keep your stitches from being quite so wonky.

Here, I've used a heavy twill and the pattern isn't quite as even as I'd like, but I'm pleased with how it turned out.
Now I'm going to try it for real. Now that I've broken all the rules, I'm going to learn how to follow them. The back of the work doesn't look nearly as nice as Jane Seymour's cuffs, but that's something I want to work toward. 

Next week, I'll talk about sashiko and patching holes.


Monday, January 11, 2016

FO: We Own It


"We Own It"
4oz yak/silk/merino blend roving purchased at SAFF 2015, Z-spun and S-plied into a 2-ply, approximately fingering weight. Two balls, 97yds, 1.98oz and 101 yds, 2.01oz.


Thursday, January 07, 2016

Month of Mending: The Mending Kit


I talk a little bit about why I mend over here, but it essentially boils down to wanting to have clothes for longer than they were intended to be worn. If I find a pair of jeans that I like. I want to keep them on my body for as long as possible.

Today, I shall be breaking down the mending kit. Those of you who follow on Instagram will have already seen mine. I use a tidy little plastic box that once held facial cleansing wipes and it's just the right size to toss into a bag and take with me if I need to. Mending can be remarkably portable.


This is the whole shebang, plus some, laid out in all its glory. Much of it is self-explanatory, but I wanted to share how I use what you see here.

These are the scissors I typically use for mending, though I do also have a nice set of shears that I keep at my sewing desk for cutting larger pieces of fabric.

Each one has its niche: The red-handled pair is sharp and slightly bent at one tip, which makes it good for picking out stitching. The grey-handled pair is sturdier and easily cuts smaller pieces of fabric. The gold-handled pair is excellent for taking out seams, and the silver pair is basically a glorified thread-cutter that I keep around because sometimes that's all I need.

These are the various threads I use. Much of it is in the "stonewashed jeans" family of colors, but I've got a wide range stashed away if I want something funky or if I want to match something that isn't jeans. The embroidery thread is just run-of-the-mill cotton DMC thread and the spooled threads range from 100% cotton quilting thread to 50% polyester/50% cotton to 100% rayon. Not pictured is a thicker thread used for sewing on buttons. I use the cotton and polycotton for mending that requires some strength and the rayon when I need something more delicate. 

I know you've been waiting on pins and needles for...


The pins and needles. (I think I'm funny)

Here we have:
  • Sharps for regular hand-sewing (sharp tip, small eyes). Good for medium to lightweight fabrics
  • Embroidery needles (sharp tip, long eyes) for heavy fabrics and embroidery
  • Assorted yarn needles (blunt tip) for repairing knits
  • Glass-head pins for holding work in place
  • A handy wooden needle case with assorted sewing needles in
I'm not sure of the provenance of the needle case, but I love it. The little cap fits on nice and snug and it's compact and safe storage that I can toss into my kit. The yarn needles usually go in my knitting kit and I don't usually have more than a couple pins in the actual kit, but those are here for purposes of thoroughness, since I do sometimes use them for mending.

Some assorted tools:
  • A small crochet hook (usually found in my knitting kit)
  • Seam ripper
  • Plastic thimble
  • Needle threader
That particular seam ripper is dull, so I usually use the gold-handled scissors above if I have a seam to take out, but I keep it in the kit anyway. I almost never use the needle threader. When I thread a needle, I do it the manly way with a near 100% success rate. The thimble is essential. If you're to have a mending kit, you need a thimble. Nobody wants a perforated finger. It took me some years to settle on this one as my favorite and for your kit, I suggest you try different ones to see which you like best. There are lots of different kinds.

And finally: Stuff that was tossed into the kit and forgotten about.
From left to right:
  • A connecter-y thingy that was meant to repair a problem with a car I no longer own
  • Stitch markers on safety pins that really belong in my knitting kit
  • A blob of wax that I sometimes, but not always, use to keep thread from tangling

And that's it! Next week, I'll be talking about blackwork embroidery and how it's used in mending. 
Last year's Project Make shenanigans are up for sale on Etsy at my shop. Hop on by if you're feeling froggy.